In Brief
Google Calendar Integration has three steps:
- Create a Google project and application ID on the Google Developer Console
- Input your application ID and secret key into the inLeague Control Panel
- After updating the control panel, go to the External Vendors tab and click on the Google link to authorize inLeague to access your league calendar. All calendars under that account will appear on the Event Manager.
In Detail
While Google used to permit sending an encrypted username and password to authorize third party applications, as of November 2014 it requires a more elaborate authorization scheme. Each instance of inLeague may be 'authorized' to one Google account; we recommend that your league create a master account using Google Apps, or, barring that, Gmail. This account should create the league calendar in Google Apps and share that calendar with any other Google/Gmail users that need it; it should not be used for any other purpose.
Before inLeague can be granted permission to access any Google Calendar, you must create both a project and client ID. You need only do this one time (or if you have lost access to the Google account that was set up previously).
Sign in to your Google Account
Before beginning, sign in to your league's Google account. Do not use a personal Google account as you will be granting inLeague (and anyone with administrator access to inLeague) permissions to all calendars under that account - not just one calendar.
Go to the Google Developer Console
The URL is: https://console.developers.google.com/project
Create a Project (if one does not already exist)
A Google 'Project' is an administrative entity that helps you segregate access to different functions. For instance, if you were also building a mobile app just for your league, you could create a separate project for that to isolate permissions between what inLeague needs and what the mobile app needs. It does not matter what your project's name or ID is.

Once your project is created, you will be taken to the Project Dashboard. Proceed to the API Dashboard (either via that link, or in the left-hand navigation pane of your Google Developer console, select APIs and Auth, and then on the roll-out menu, select APIs.) From this page, we are selecting the specific Google interface that we want to use - we only need one, and there are many to choose from!
Enable the Google Calendar API
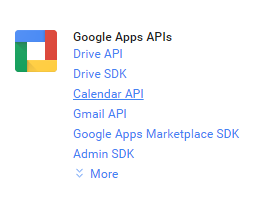
On the API screen, look under the third column (Google Apps APIs) and select Calendar API. Then select Enable API.
Now that the interface exists, we have to create an access key so that inLeague can communicate with it.
Create OAuth Access Credentials
"OAuth" is an industry standard for access and authorization between systems. We have to generate our OAuth credentials one time, and then save them within inLeague.
On the left-hand pane where you selected APIs, now select Credentials and then Create a new Client ID.

Leave the default value of web application selected and click on Configure consent screen. When you log into inLeague to configure your Google credentials, the information you enter here will be displayed. You are the only person who will see them - regular inLeague users do not see any of this, so the information does not have to be thorough. Select an email address and enter the name of your league under Product Name. You will now be returned to the Create Client ID page.
Enter Domain and URL Information For Your League
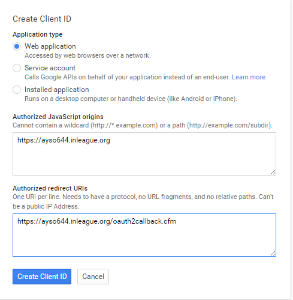
As part of Google's security mechanism, it requires that you specify the origin of all Google authorization requests. Because inLeague will be making these requests for you, you must enter your inLeague domain name and a 'callback' page which is where Google sends the result of the request for inLeague to capture. This is the most important step and requires manual entry on your part:
- Under Authorized Javascript Origins, enter the URL to your inLeague domain (without the /inleague on the end). For instance, if your inLeague site is www.wssl.org, enter https://www.wssl.org in this section; if your inLeague site is at soccer.inleague.org, enter https://soccer.inleague.org in this section.
- Under Authorized Redirect URLs, edit the value Google will have filled out for you. It should be the same value as step 1 with /inleague/oauth2callback.cfm on the end, e.g. https://www.wssl.org/inleague/oauth2callback.cfm
When you are finished, the window should look like this (with your league's domain substituted for demo.inleague.org):
Click Create Client ID.
Record your Client ID and Secret Key in the inLeague Control Panel
On the upper right-hand part of the page, you should now see your client details. You need two items: your Client ID and a Secret Key. They will appear as below (the following is an example only and will not work if copied from this help file):
In your InLeague control panel, enter the Client ID and Secret Key and click Update Settings. At the top of the control panel, select the external vendors tab. Under the Google section should be a link to complete the authorization process. Select the link, confirm the request, and inLeague will be able to access your Google calendar indefinitely.
To remove or change your Google Account
To change the Google Account inLeague uses, simplylog in to the new account you want to use and follow the instructions in this file to overwrite the client ID and secret key. Repeat the last step under 'external vendors' and inLeague will now use the new account.
To remove access entirely, simply delete the client ID and secret key from the control panel.